Saturday, 3 July 2010

How We Built A Rube Goldberg Machine

...and what we'll do differently if we had our time again!

It was JP's idea on the night of the first Nottinghack meetup. I don't know if he was inspired by OK Go's "This to will pass" Goldberg edition only or if it was just a prompt to wanting to build one?

You may have seen that Ok Go! video, but did you ever stop to thinks about how hard that machine was to get right?


Consider this:

1. this Rube Goldberg machine had to run in-time with the song... not appear to run in time, or run in the edit, actually run to a time plan, to fit the song.
2. Like all Rube Goldberg machines, it's only clever if you really do it, really make it work end to end. So Ok Go!'s video is shot in one take.

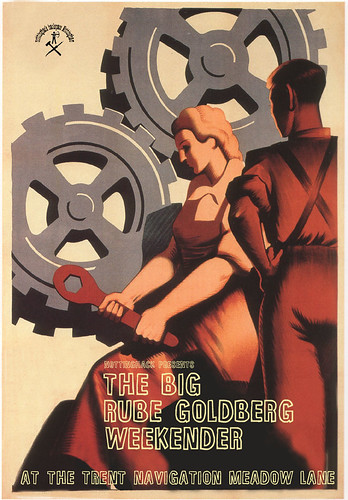
I rather wish I'd seen Adam Sadowsky's TED talk BEFORE the Big Rube Goldberg Weekender back in early June.

In the course of the talk Adam talks about Life Lessons... the Lessons they learned making their machine...

1. Small Stuff Stinks (...but is essential)

for example, say's Adam, a marble will get stuck and fall out of it's track and get stopped by dust or tiny changes in humidity, a balling-ball will pretty much do the same thing every time(because it's so much bigger and heavier). He then says you've still got to have smaller stuff, it's a place to start. We found the same thing, nothing we had was really heavy enough most of the time.

2. Planning is incredibly important

"No battle plan survives contact with the enemy... I think our enemy was physics!" says Sadowsky. "...but while planning is important so is flexibility." Just like us they had a number of bit of the machine that just didn't work or look right. For us some where just fantasy!

3. Put Reliable Stuff Last

"You don't want to have to reset the whole machine..." because the stuff at the end didn't work.

4. Life is messy (and this too shall pass).

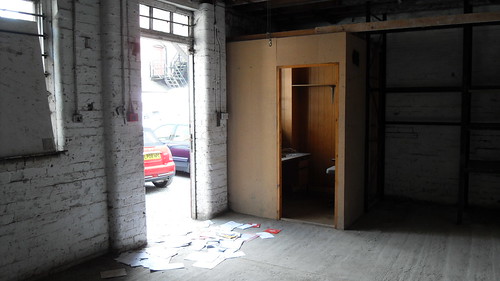
Here are the You Tube video's of our Rube Goldberg machine. We never did get a complete run through, but we came so close, it hurts to think back...


We'll call our Life Lessons "The Nottinghack Laws of Goldberg"

Morrow's 10 Commandments of Goldberg

1. Leave at least a whole day to run the machine

2. Have it all in one room

3. All builders should have a basic tool set on them at all times - Scissors, a few screws and nails, nylon cord, zip ties, screw driver, hammer, ideally a battery drill (We didn't have enough power or power tools) gaffer tape

4. Weights - gravity is very important and it's much easier to create momentum with more weighty props, balls etc.

5. Have one person coordinating distribution of tools and stuff.

6. Have a viewing area, this might ideally be a mezzanine floor above the machine (or similar).

7. You need to collect more stuff much earlier on.

8. Have a few set pieces and lots of small jobs set-up for people.

9. Have a coordinator for the whole machine.

10. Have a start and finish element in place before the event.

10.1 Nominate an official "sceptic" to temper the creative element in all of us....

10.2 Always take the time to make your trigger/stand/gizmo/widget properly and stoutly. This will save time in the setups later and is less likely to wear out.

10.3 Gaffer tape looses it's sticky, string stretches, blue tak is tactless, cardboard goes floppy... You get the idea stuff wearsout build to last wood/metal/screw

10.4 Always drill a pilot hole before screwing (up) wood!

10.5 If you DO have a hair trigger in your device make a safety to stop it goes off before time

Lloyd's First Law of Goldberg

"If an element causes the machine to fail 3 times in a row redesign it!"

Hayward's Laws of Goldberg

1. Use nylon cord rather than string. String stretches, and frays easily.

2. Nothing generates as much force as you think it will. Sometimes, a thing won't generate force consistently enough, and might be too gentle on some attempts.

David went on to say...

"Avoid hair triggers: They're easy to build but too erratic in use, especially as things will wear out through repeated use. Construct ones that work every time instead (e.g. the gate on the bottle for our second run worked every time).

Having the right amount of people is tricky. Too few, and the machine takes ages to set up for each run. Too many, people fill in for each other and things don't get set up correctly.

Have the same people set things up every time, and ideally they should be the people that built that section. There's a lot of room for failure in every mechanism of an RGM, for instance resetting with the large orange ball just 5mm out of place caused our best attempt to fail on Sunday."


I suppose the question is will we do another machine? oh yes...

Tuesday, 1 June 2010

More KAP

P7130018

Did some more KAP (Kite Aerial Photography) using my Hamster Ball camera rig this bank holiday weekend. Great performance from the kite. Using the new longer/stronger line managed to get the kite up to about 150ft.

There was still a lot of violent bouncy motion making the ball and camera swing around like mad. This caused the first of my problems. The MECANO parts of the Picavet cross came apart due to a loose nut. I made a running repair.

The Arduino battery came loose several times before the camera bounced out of the pod and the battery was lost in the long grass. The above picture was one that I actually managed to get. I'll need to angle the camera towards the horizon. It's almost impossible to determine the height due to the lack of points of reference.

Will be trying with a smaller camera and pod as well as taking the Arduino down to components to lighten the whole thing.

Monday, 10 May 2010

The Eye in the Sky OR if the KAP fits...

P6160054

I just love maps and aerial photographs I've been collecting maps (buying them from car boot sales) for years. I always thought I would have made a great aerial photograph interpreter. The satellite view on Google Maps can keep me entertained for hours on end, finding old air fields, following the line of disused railway lines and spotting oddities.

Some of you will know that my Twitter name is KiteRunnerUK because I love kites. You maybe surprised to know that I don't like kites with 2 stings on them. I've never felt the urge to go kite surfing or anything like that. I like basic simple classic kites. You can do some pretty good stunt flying with a pound shop kite if you know how to work it. I used to have a very fancy stunt kite but could never get it to do anything but nosedive into the floor.

Not so long ago I decided to combine these two interests and make a Kite Aerial Photography (KAP) rig. To make a KAP rig you need a few basic things:

1. A Kite with good payload capability for this I use a Cody Box Kite.
2. A camera that you can set to take either one or several delayed pictures. I use an old digital camera attached to an Arduino Micro controller.
3. A Picavet suspension - An arrangement to attach your camera too designed to keep it level

Below are some links to some of these items:

Kite - From Sky High Kites on eBay
Picavet Suspension - A Google search will show you lots of info on this. Mine is made of Meccano
Arduino Camera Hack - A very simple (and brilliant) hack from Randofo on Instructables.com

On May Day bank holiday I met up with David H at Wollaton Park to test my rig in the air for the first time:

P6160062
My Cody Box Kite
P6160040
About the best actual aerial shot I got
P6160064
Most of my shots looked like this

The string that came with my kite is only about 50ft ideally you need to get your kite and rig up to about 200ft. Perfectly possible with this big kite. The lighter your rig the better. I didn't make a great effort to position the camera and at low level it was bouncing about a lot and obviously either pointing to the ground or up into the sky.

Another issue is that the area of the park, the direction of the camera and the prevailing wind meant that it is very difficult to tell if the photos I did get are in the air or on the ground. I stood at the bottom of a hill which also didn't help. To make matters worse it started to rain and the batteries gave up (I had no spares).

All in all I can't wait to try again. Next time I'll use a longer sting with a hoop winder rather than the cheap thing that came with the kite.

I'm thinking about ditching the Picavet and putting camera and Arduino into a ball of some sort giving the camera and Arduino a greater amount of protection.

I'll be doing a camera hack and aerial photography show and tell in the near future at Nottinghack. Do leave a comment if your interested or have any questions or suggestions!

here follows a funny little video showing that kite aerial photography is nothing new!


More inspiration from Make Magazine - Chris Benton is amazing at KAP

Thursday, 29 April 2010

DerbyHack - A venture up the A52?

Last night's excellent Drawdio & Soldering 101 workshop by our very own pedal-power Matt Little was a huge success. There was something for all levels of experience. I'm chuffed with my Drawdio, a good little soldering project with just the right level of tinkering required to practice a little debugging and use the multi-meter in anger (but not with violence). Mostly I enjoyed the feeling that Hackers got a little bit of gratification from their efforts, smiley faces when your pencil starts to sing.

Nottinghack and the proposed "Hackspace East Midlands in Nottingham" has a number of interest hackers in Derby. As a trial to see if it will work Nottinghack propose to run the Drawdio Hack & Soldering 101 workshop at a Derby venue in the next few weeks. This will give Derby based hackers the opportunity to experience a hack without the extra commitment of getting to Nottingham. If the event proves successful we'll try one in either Leicester or Loughborough.

Ideally some hackers from Nottingham will join us to help make the workshop a success, maybe we can arrange a lift share? Eventing across the catchment area will be an important part of making hacking accessible & perhaps encouraging potential hackers, put off by the distance to get involved in forming local groups.

Alternatively it maybe a total calamity! If you'd like to be part of Nottinghack you can register for updates at www.meetup.com/nottinghack

Don't want to join meetup but want to hack anyway? Then email me (nottinghack@gmail.com) with your interest for any advertised meetup and I'll ensure a space is saved for you.

Please leave any comments below.


Tuesday, 27 April 2010

Nottinghack - Drawdio

Nottinghack - Drawdio 
By Matt Little 


Circuit Diagram and PCB layout were done on KiCad - an open source PCB design package.

Parts List:

BT1       BATTERY

C1         Capacitor Polyester 0.1uF

C2         Capacitor ceramic 680pF 

C3         Capacitor Electrolytic 100uF

Q1        Transistor 2N3806 PNP

R1         Resistor 270K Ohms

R2         Resistor 10kohm 

R3         Resistor 10M Ohms

R4         Resistor 10ohm

SP1       SPEAKER

U1        Timer NE555N


1. Turn your circuit board so it look like this (below) 

2. Add the resistors:
From the left: 
R3 - 10M Ohms (BROWN, BLACK, BLUE)
R2 - 10k Ohms (BROWN, BLACK, ORANGE)
Top right: R4 - 10 Ohms (BROWN, BLACK, BROWN)
Bottom right: R1 - 270k Ohms (RED, VIOLET, YELLOW)


3. Add the capacitors:

4. Add the buzzer: 
to holes on far right, + on the left and - on the right (speaker not shown)

5. Add the transistor:

6. Add the 555 timer IC:

6: Add the battery pack & test:

7: Solder the copper foil to the long plate on the other side of the circuit board:

8: Enjoy! 


Wednesday, 21 April 2010

Hackspace - The Final Frontier

About a week ago a task team from Nottinghack met with a man... a man from the council at a destination that will remain classified!

The teams instructions were clear, meet in the car park and Tom will have the key. A few days before I'd been in contact with Tom, the keeper of a property which on paper seemed too good to be true. A low rent and rate, near enough to the station and bus routes to make it's slight out-of-town location not to concerning. Better still this space has parking and the Victorian artisan charm that I really like.

SDC11173
Tom opened up a door wedged closed by the weight of letters from the Inland Revenue that the former tenants are probably happy not to get any more. I don't know if anyone was watching but at this point my face dropped. The lower room was dark and damp. The walls festooned with iron bracketing for storing lumber. A broken (well if it isn't I'm not switching it on) gas heater hanging, abused from the non-to-safe looking ceiling. To the left of the door is a small (very small) office with a BT Viscount phone in original Beige (no dial tone).

SDC11170
I ask Tom about the ablutions, there are non. I ask Tom how we get to the upper floor and he takes us back outside and shows us the a very steep fire escape stairs. Up we go. We enter the upstairs room which has the most gorgeous bow topped windows, letting in a lot of light on a sunny April day at two o'clock. This room feels bigger (though it can't be) and drier. A suspended ceiling is bowed and deformed with damp above our heads. The rough thick floorboards have several large gaps allowing us to see the room below. At the far end of the room a kitchenette with tap!

SDC11165
The power sockets hang rusting from the wall and at least their is a fire alarm system. It doesn't take a huge amount of dream fuelled imagination to picture the space in full swing on a hack night!

Alas though, we'd out grow it so quickly. If given the space on a tiny peppercorn rent, our list of demands before we could move in...

- Fix power and lighting
- add toilet
- Fix roof
- Survey for soundness
- Fix floor

...would not make this appetising for the landlords, and we know we'd use any money we could raise patching the place up before we'd even got a soldering iron to share. Truth is the Hackspace would become the project and not hacking.

Over a cup of coffee back at Doc Little's workshop we chewed over these facts. The trip had been useful as a reality check for me. I now understand what your $$ can get you, how big it looks and what sort of a state it might be in. There is another much larger (and who knows better) space at the same site which we'll have a look round. It's 3x the price of course...

At least we now know what to ask for and how much discount and funding we'll need! Leave a comment below or let me know if you have any thoughts or ideas about our future home, where ever it may be!

SDC11169


Friday, 16 April 2010

Announcing - The BIG Rube Goldberg Weekender

postersource2a
click on picture for larger image

The BIG Rube Goldberg Weekender -

Rube Goldberg was an illustrator who drew very similar picture to the British cartoonist William Heath-Robinson , ridiculously protracted devices to perform the simplest tasks. Goldberg Machine (RGM) building contests are wildly popular the world over. Recent Rube Goldberg machines have been seen on a Honda advert and in one of "Ok Go's" excellent videos to their song "this too will pass"

I've always wanted to make one. A search of You Tube will show you some smashing examples. Don't be fooled RGM are very hard to make and take planning and patience. Be prepared to reset them many times.

Nottinghack now present the BIG Rube Goldberg Weekender. At the Trent Navigation Nottingham on the weekend of the 5th and 6th of June we'll be running a major RGM building event over 2 open days (Saturday & Sunday) with some preparation work by Nottinghack in the week proceeding. The official kick-off for this event will be An-Evening-of-Rube-Goldberg (Nottinghack only) for planning.

The planning evening will involve a few RGM videos lots of blueprint paper for ideas and many real ales (for they have a micro-brewery at the Trent Navigation) this is likely to be in early May. It is intended to position the BIG Weekender as a recruitment, fund-raising and awareness event for Nottinghack. Open to all ages.

We're going to need lots of bit-n-bobs so if you know your interested then start saving bits now. Have a look at the video on You Tube many of the best ones are here on the Nottinghack meetup page. Nottinghack will prepare a few RGM set-pieces to which others and members can create links between the elements.

The Trent Navigation can provide two rooms (on an upper floor) which we can use, and also a store room (which we can use any time prior and after the event). They also have at least 10 parking spaces and a plenty of outdoor space. They provide free WiFi for the event as well as a great and tasty menu.

If you have an idea for the RGM or want to start working on an element then please let us know on the discussion forum HERE. We'll be inviting and involving the press and the community. This is an opportunity to have a great fun hack and also to drum up massive amounts of buzz around Nottinghack taking us one step closer to a real Hackspace.

Please do comment below or email me through Nottinghack meetup site to get involved. We'd be very happy to have visitors from other Hackspaces or any sponsorship. We are also looking for film makers, engineers and any interested folk to get involved.